Showing posts with label QR code. Show all posts

Wednesday, March 16, 2016

Creating QR Codes for the Classroom

Today I am going to be writing about one of my favorite ways to use technology in the classroom- QR codes!


There are tons of websites you can use to create QR codes, but I am going to be talking about the site that I always use- qrstuff.com


Something else you will need is a QR Reader for the devices that your students will be using. QR codes can only be used by devices that have a camera and an app to read the codes. There are tons of free ones in the app store, just search for QR code reader and a long list will show up.


The first kind of QR code I am going to talk about is linking to a website.

One of the units we always do in first grade is research writing. Let's say that I want my students to be able to research their animals on the tablets. But for safety reasons, I don't want to give them free reign to just google search. I can open the website I would like them to use on my computer, in this case, World Book Kids.


Once I have the website open, I click in the address bar so that the link is highlighted, then copy it. I go to qrstuff.com and make sure that "Website URL" (the first option under "data type") is selected. Then I will paste my copied link into the box. After the QR code image refreshes to the correct image (it may take a moment, you will see it change), I can download my QR code to my computer.


Now I need to have a way for students to access the QR code. I like to make things a bit fancy, so I put together a card that I can laminate and put out for the kids to scan, but if you aren't worried about making things look cute (or if you are scrambling to put this together! It happens!), you can just put the codes in Microsoft Word and print.


Since World Book is a subscription site, I would also need to have the login information available for students.


The next kind of QR code that I often use is a link to a YouTube video.


Earth day is coming up, so I may want to include some content about recycling in my literacy centers. I found a short Reading Rainbow video about recycling on YouTube and want the kids to watch it, then respond to a comprehension question about the video.


As you can see, ads have popped up around and on the video. I really don't want my students to see any ads while they are watching the video (who knows what may pop up!), so there is an additional step I will need to take.

I start the same way as I did with World Book. I will go to the address bar, select the link, and copy it. Here is where the big difference comes in. Instead of pasting the YouTube link directly into QRStuff, I am first going to filter the video through a site called safeshare.tv to remove the ads and links to other videos.


Once I have pasted my YouTube link into the box and clicked "Generate Safe Link," the following screen will come up:


On this screen, you can decide if you want to keep your video private and alter the title/description. One thing I would recommend is checking the box to hide the buttons below the video player. If you don't, there will be buttons linking to Facebook, Twitter, etc. under the video. Once you submit, you will be ready to make your QR code!


The process here is the same as it was for generating a website link. Although QRStuff has an option for YouTube video links, if you filtered the video through safeshare, you will want to use the regular Website URL option.


Again, you will need to have a way for students to access the code (and questions if you are using them).

Print the above picture for a quick and easy center!
Last, we have plain text QR codes. I use these as a way for students to self-check answers or to give students additional directions or questions to answer.

The first thing you want to do is make sure that the Plain Text option is selected under data type.

Now you are ready to enter your text!


I try to keep it relatively short. You will notice that the QR code will get complicated very quickly as you add more text, so I try to keep it two sentences or fewer. Sometimes QR readers can have trouble reading the codes if they have too much information included.

Once the code has refreshed, you will be ready to download your code and add it to whichever activity you are creating.

I use this kind of QR code the most as a way for students to check their answers. Here is an example of a plain text QR code:


In this case, the QR code only includes a yes or no answer.

I usually have students work on the cards individually, then work with a partner/small group theck their answers when they are done.

You can find more QR code task cards here.

That's it for my QR code tutorial! I hope you found the information useful and that you feel ready to try making some codes for your own classroom!


Monday, July 28, 2014

Monday Made It- Supply Caddies, Hall Passes, Scales, and an open house freebie!

I'm linking up with 4th grade frolics for another Monday Made it.


I've got a few pretty big projects to share today!


I have shelves with supplies at each of my student tables (see the post here) and I decided that the caddies I use for pencils/markers needed an update.


I started with the plain caddies in my table colors,


then I took some plain plastic cups and hot glued felt around them to fancy them up a bit. I also painted some of my plain wood tags black and tied them on with polka dot ribbon (that has been secured with a rather large amount of hot glue, just in case!)


I am really loving the results! Hopefully this will help my kids keep things a little more organized this year than my class did last year!


I've seen a lot of pins about hall passes and wanted to fancy mine up a bit.
 
 
I took more of the unfinished wood tags, then covered them with the BEST duck tape I have ever seen! Flamingo duck tape!


I could not have been more excited when I found it at Michael's, it is absolutely perfect for me!


I added a black ribbon, then hung them up in my new display. It's an unfinished wooden shadowbox that I got and painted/mod podged. The white hooks are push pins that I pushed through, trimmed, them put hot glue over so there are no sharp edges. The finishing touch was the pink ribbon border.


I also did the same thing for my media center passes.


I ran out of the green ribbon that I like to use in classroom projects, so I didn't get to add the border inside yet. I am also debating whether or not to add some white polka dots to the black frame. It looks a bit plain to me, but I tend to go a bit overboard... :)


I wanted to have my QR code stories available to my students for when they finish their centers early, but don't want them to be going into my newly-made/beautifully organized binders to get them, so I came up with this!


I printed a duplicate set of the code cards and will be putting them onto binder rings. I will have two sets hanging in this display in the library for my fast finishers.


I saw this idea for turn-in baskets that require students to highlight their name with a color that corresponds to their level of understanding on Elementary School Garden a couple of weeks ago and loved it! I did want to make a few changes so that it would coordinate with the colors I use on scales in my classroom.


I didn't want to take up all of the counter space with multiple baskets and already had this extra set of plastic drawers, so I made the labels to match and stuck them on.


I labeled the buckets for the markers/highlighters and it is ready to go! I will also have a few markers at the student tables so that there isn't a long wait to turn things in.


This is the new table scale I came up with for this year. I picked the colors to match my tables (naturally), but they are also in the order that they appear in on my behavior chart. I figured it would make it a bit easier for my first graders to remember what each color corresponds to if it matches the order of our behavior chart. 

Each student will have one at their desk so that they can show their level of understanding while they are working independently.


I had a moment this week when it suddenly hit me that our teacher work week starts on August 11th, not the 18th like I had thought! Naturally this lead me to a small amount of panic, I do not feel at all ready! I went through my to-do lists and picked out something that I will need to have done before open house on the 15th, my tags for the little bags of goldfish I like to give out.

I was digging through my craft boxes looking for the extra ribbon I remembered having when I came across this- 


I must have made enough for two years last year! Thank you last year me!
 
I was so thrilled to find these pre-cut and ready to go that I have decided to share them as a freebie. You can get the tags in three different backgrounds for grades K-3 in my store here. Enjoy!
 
 
Victoria
 

Monday, July 14, 2014

Monday Made It- Nameplates, door decor, and QR code center organization!

I'm linking up with 4th Grade Frolics for another Monday Made it!

4thgradefrolics.blogspot.com


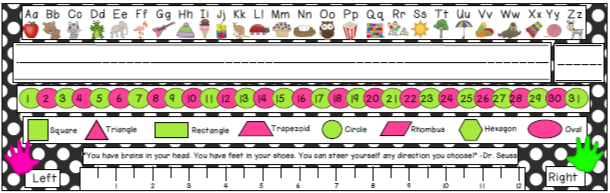
First up this week I have my new desk nameplates for next year! I made a few changes to the ones I used last year, moving some things around and adding the shapes/ruler. We are not going to be focusing on measuring by nonstandard units for the first time this year (yay!), so I think the ruler is a perfect addition.


I just sent them to Staples for printing and they should be ready for me to take over to the classroom store for laminating by Tuesday! Last year was the first year I laminated my nameplates and what a difference it made! They stayed nice the entire year instead of just the first couple of months.


 I also made some changes to my front door display. My set last year was black and white and seemed a little too dark, so I brightened it up a bit!


I still have to cut out the circles (one of my least favorite things to do, but the kids wouldn't really by "spotted" in first grade if their name wasn't on a spot, so I will just have to do it!)


Next up, organization!


I made some binders to store the QR code listening centers I have been making, complete with polka dot covers. :)


Each set is in its own page protector pocket, with Velcro at the top to keep them from slipping out. I used scotch expressions tape to cover the Velcro so that it would look better.


I also printed out labels with the covers of all the books. I don't always remember what a story is about by seeing just the title, but the cover usually jogs my memory.


I recently ordered a 120 pocket chart from amazon, but the cards it came with are pretty boring and only came in black or primary colors, so I decided to make my own!


I have a 100s pocket chart that came with my grade level math kit, but our standard goes to 120 and I always have a few students who really get lost once they get to 110, so I thought this would be better. I want to have chart displayed all the time and have designated times for the students to pick a card and find where it goes.

The pocket chart itself is the usual royal blue, which obviously does not work for my classroom, so I am hoping to have made it black by next week...

 Will I be successful? Stay tuned!

Victoria